Power Through Deletion. 2015 WRX TGV Delete Kit, Part 2: 3D-Printed Prototype Test Fit
3D-Printed Prototypes
To confirm the dimensions and design of our prototype, we decided to utilize some of our rapid prototyping tools. We fired up our 3D printer and loaded the model. Check out a couple images showing the progress of the print.
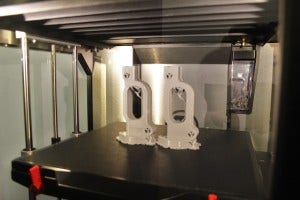
3D-printing 2015 WRX parts

3D-printing 2015 WRX parts
Once the printing process was complete, we cleaned up the prototypes and installed them on our 2015 WRX to verify fitment.
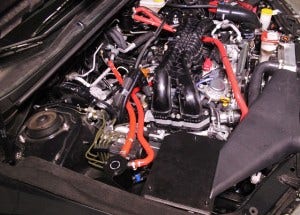
3D-printed 2015 WRX parts
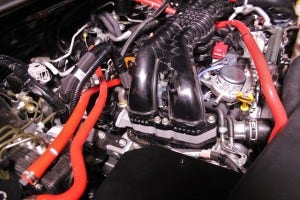
3D-printed 2015 WRX TGV delete installed
You will notice these prototypes include a rear flange to attach to the TGV solenoid. We experimented with a design that retains the flange, in order to bolt the stock solenoids in place for visual inspection purposes. After evaluating this setup, we decided the flange was unnecessary and removed it from the design. Our two functional prototypes will be more similar to our original 3D models.
Coming up - Functional Prototypes
With fitment confirmed, we began working up a couple functional prototypes for product testing. Typically, these delete spacers are constructed from aluminum. We decided to experiment with a different material choice, so we are working up a prototype in aluminum as well as a second unit in Delrin®. We will be evaluating the power output from removing the stock valves, as well as looking at temperature differences of the intake manifolds constructed from the two different materials.
Thanks for reading!
-John