Breathing Fresh Air - Intake R&D, Part 5: Prototype Testing
We've reached a massive milestone in the development of our 2018+ Jeep JL 2.0T intake. After months of measuring, testing, printing and waiting, we finally have a functional prototype. Although it's been a long road to get to this point, the development of this intake has also been a breath of fresh air; we're trying a lot of new techniques and exploring new R&D methods. But before we jump into what's new, let's look at what brought us to this point.
We began developing our intake by looking at the stock intake. Our engineer, Ye, filtered through all the components to find what needed to stay and what we could improve. She 3D scanned and meticulously measured every inch of the stock intake and the JL's engine bay. Later, a flow-bench test of the stock intake gave us a baseline to compare our design to. With measurements, 3D scans and testing of the stock intake complete, we began building our prototypes.
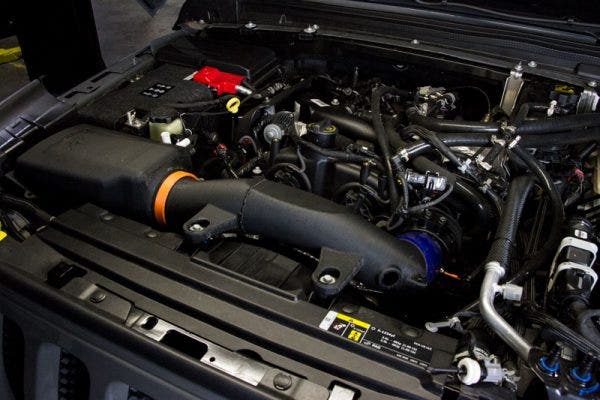
To speed up the prototyping process and reduce the end cost of our intake, we utilized our 3D printers to churn out two different prototypes. One prototype utilized the factory turbo muffler, while the other replaced that section with a straight through design. We then installed both designs onto our JL to make sure both fit and no changes were needed. Any changes at this stage could affect the flow bench results, so it was important that everything fit like a glove before we moved on.
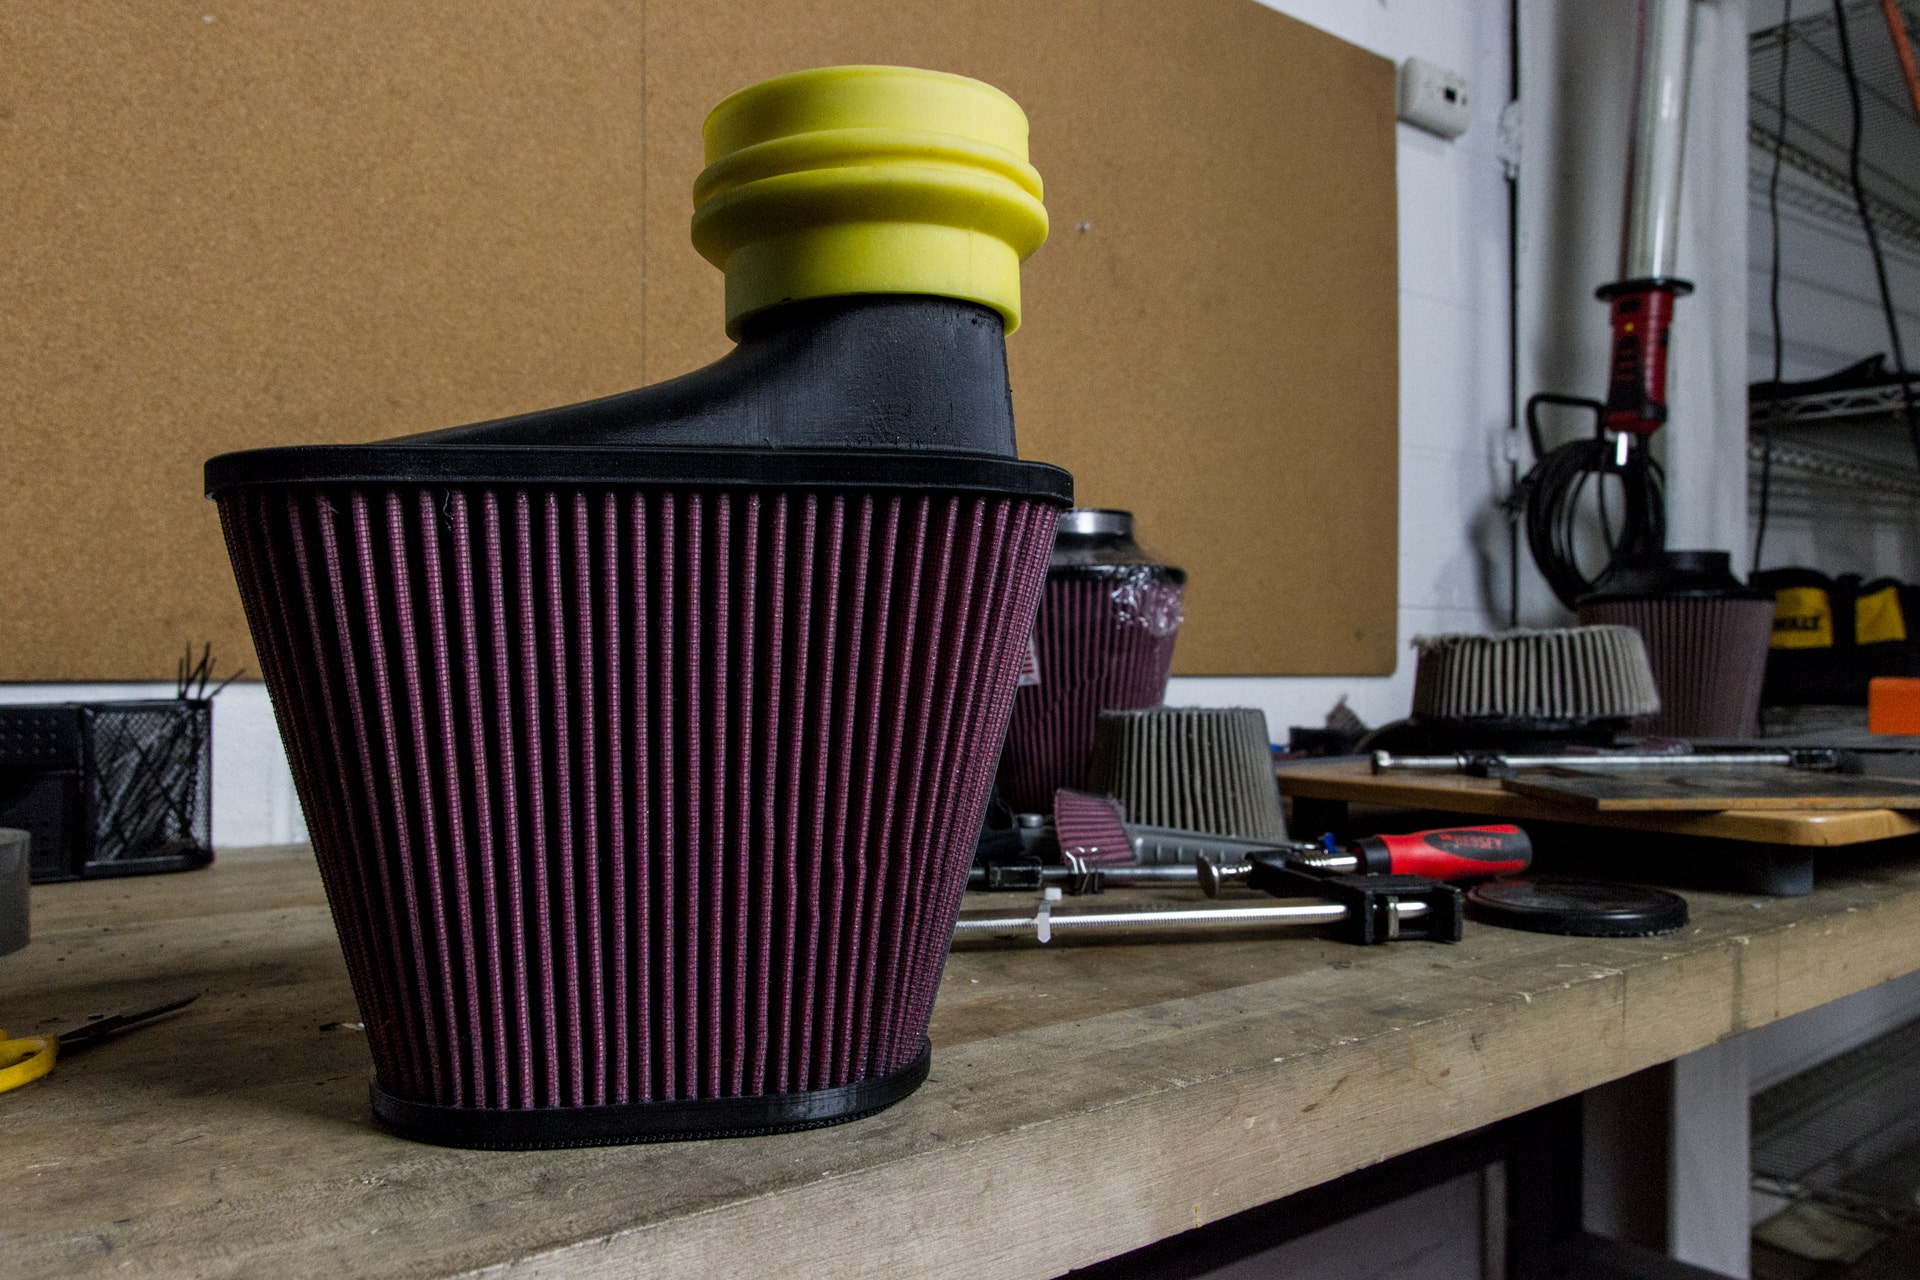
Finally, it was time to flow bench test our two prototypes and compare them to the stock intake. There was one problem, however. Our prototype air filter was a solid 3D printed part. Our flow bench data wouldn't be accurate without a filter, and aside from drilling thousands of holes in our 3D printed version, there was no way we could pull air through the printed part. Which brings us to today's update.
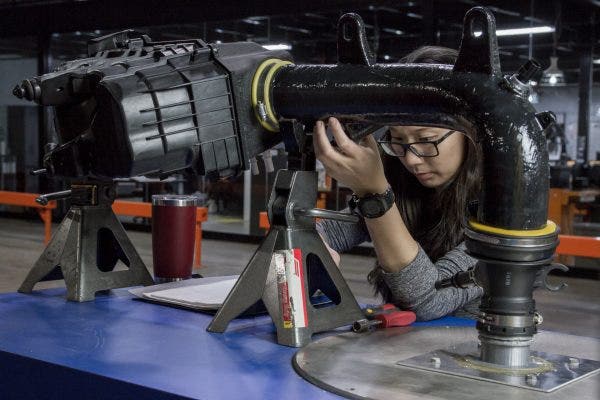
Our task was simple, but we had never attempted it before. We needed to use materials we had in the shop to create a custom filter that would flow as well as our final production model. To make our engineer's job even more difficult, the shape of our filter is unique to make the most of the available space in the airbox, and the coupler is designed to lock into the airbox. To accomplish this simple yet daunting task, we again turned to our 3D printers.
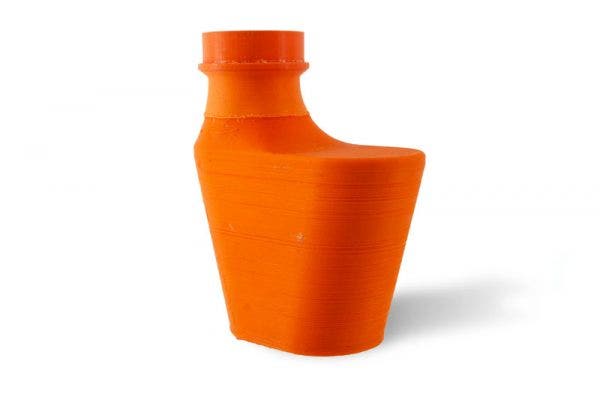
The first 3D prints were the endcaps for the filter. These would hold the shape of the filter and give us a place to mount the coupler. To join our filter to the prototype intake and airbox, we then printed a mold and filled it with a casting silicone to create the coupler. While the coupler cured, our engineer worked on filling the space between the two filter end caps.
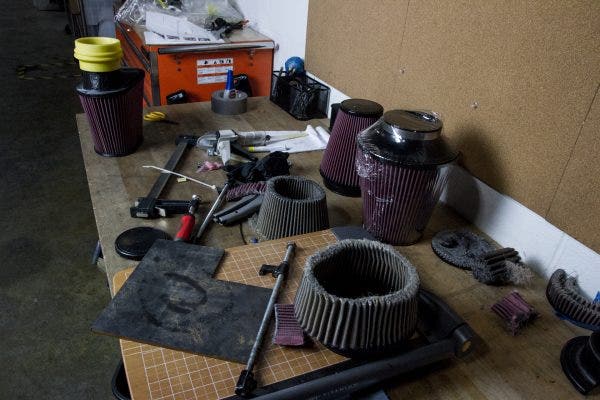
Luckily, we keep a stash of air filters in our shop for intake development. But we've never produced a filter anywhere near the shape our JL intake called for. But that didn't stop Ye. The filter material in our JL intake will be the same as our existing intakes, so Ye began cutting apart filters and eventually came up with a solution. It took a few tries to cut the filters cleanly and join them to the end caps, but soon we had a filter.
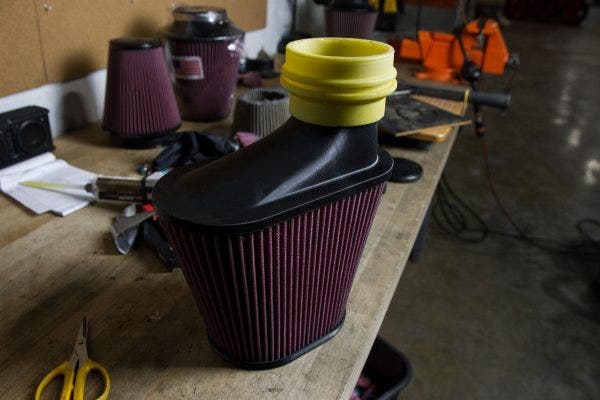
With our functional prototype filter complete, we could move on to flow bench testing. The goal for flow bench testing was two-fold: compare our intakes to the stock intake and to each other. We needed to make sure both of our designs flowed better than stock. At the same time, we'd compare the flow data for each and choose the best performing design to move forward with. This testing would be the first indication of whether our intake had a shot at being successful, so all eyes were on the flow bench readout.
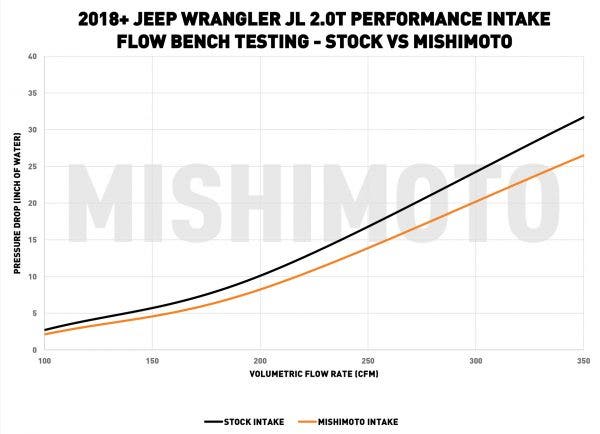
We ran each intake design on the flow bench, comparing the results to the stock intake after each test. We were surprised to see that the pressure drop across both was nearly identical. The muffler had little to no effect on the performance of the intake. Since both designs performed equally well, we'll leave it up to our ears to decide which is best. If dyno testing reveals a better sound without the muffler, we'll go with our straight-through design. If the sound difference is negligible, we'll keep the factory muffler and save some money, making the intake cheaper for our customers in the end.
What wasn't so surprising was how well our intake flowed compared to stock. Graphing the flow bench test results showed a significantly lower pressure drop across our intake. When we averaged all the flow rates, our intake created a 20% lower pressure drop than the stock intake. That 20% increase in flow means that your engine will be able to breathe in more air and inject more fuel along with that air. More air and more fuel equals more potential for power.
The positive results from the flow bench mean that it's time to move on to testing our intake on the dyno. In the next post, we'll see if that 20% increase in flow translates to more power and more sound. We know from previous projects that intakes on modern engines can be fickle, to put it mildly. Our fingers are crossed for more power and no check engine lights.
Keep an eye out for the next update and, as always, let us know what you think!
Thanks for reading,
-Steve