Breathing Fresh Air - Intake R&D, Part 4: Rapid Prototyping
Sometimes the long road is the path we take when we want
to slow down, take a deep breath, and enjoy the view. Sometimes the long road
is the path we take when we want to do something well. While we love watching
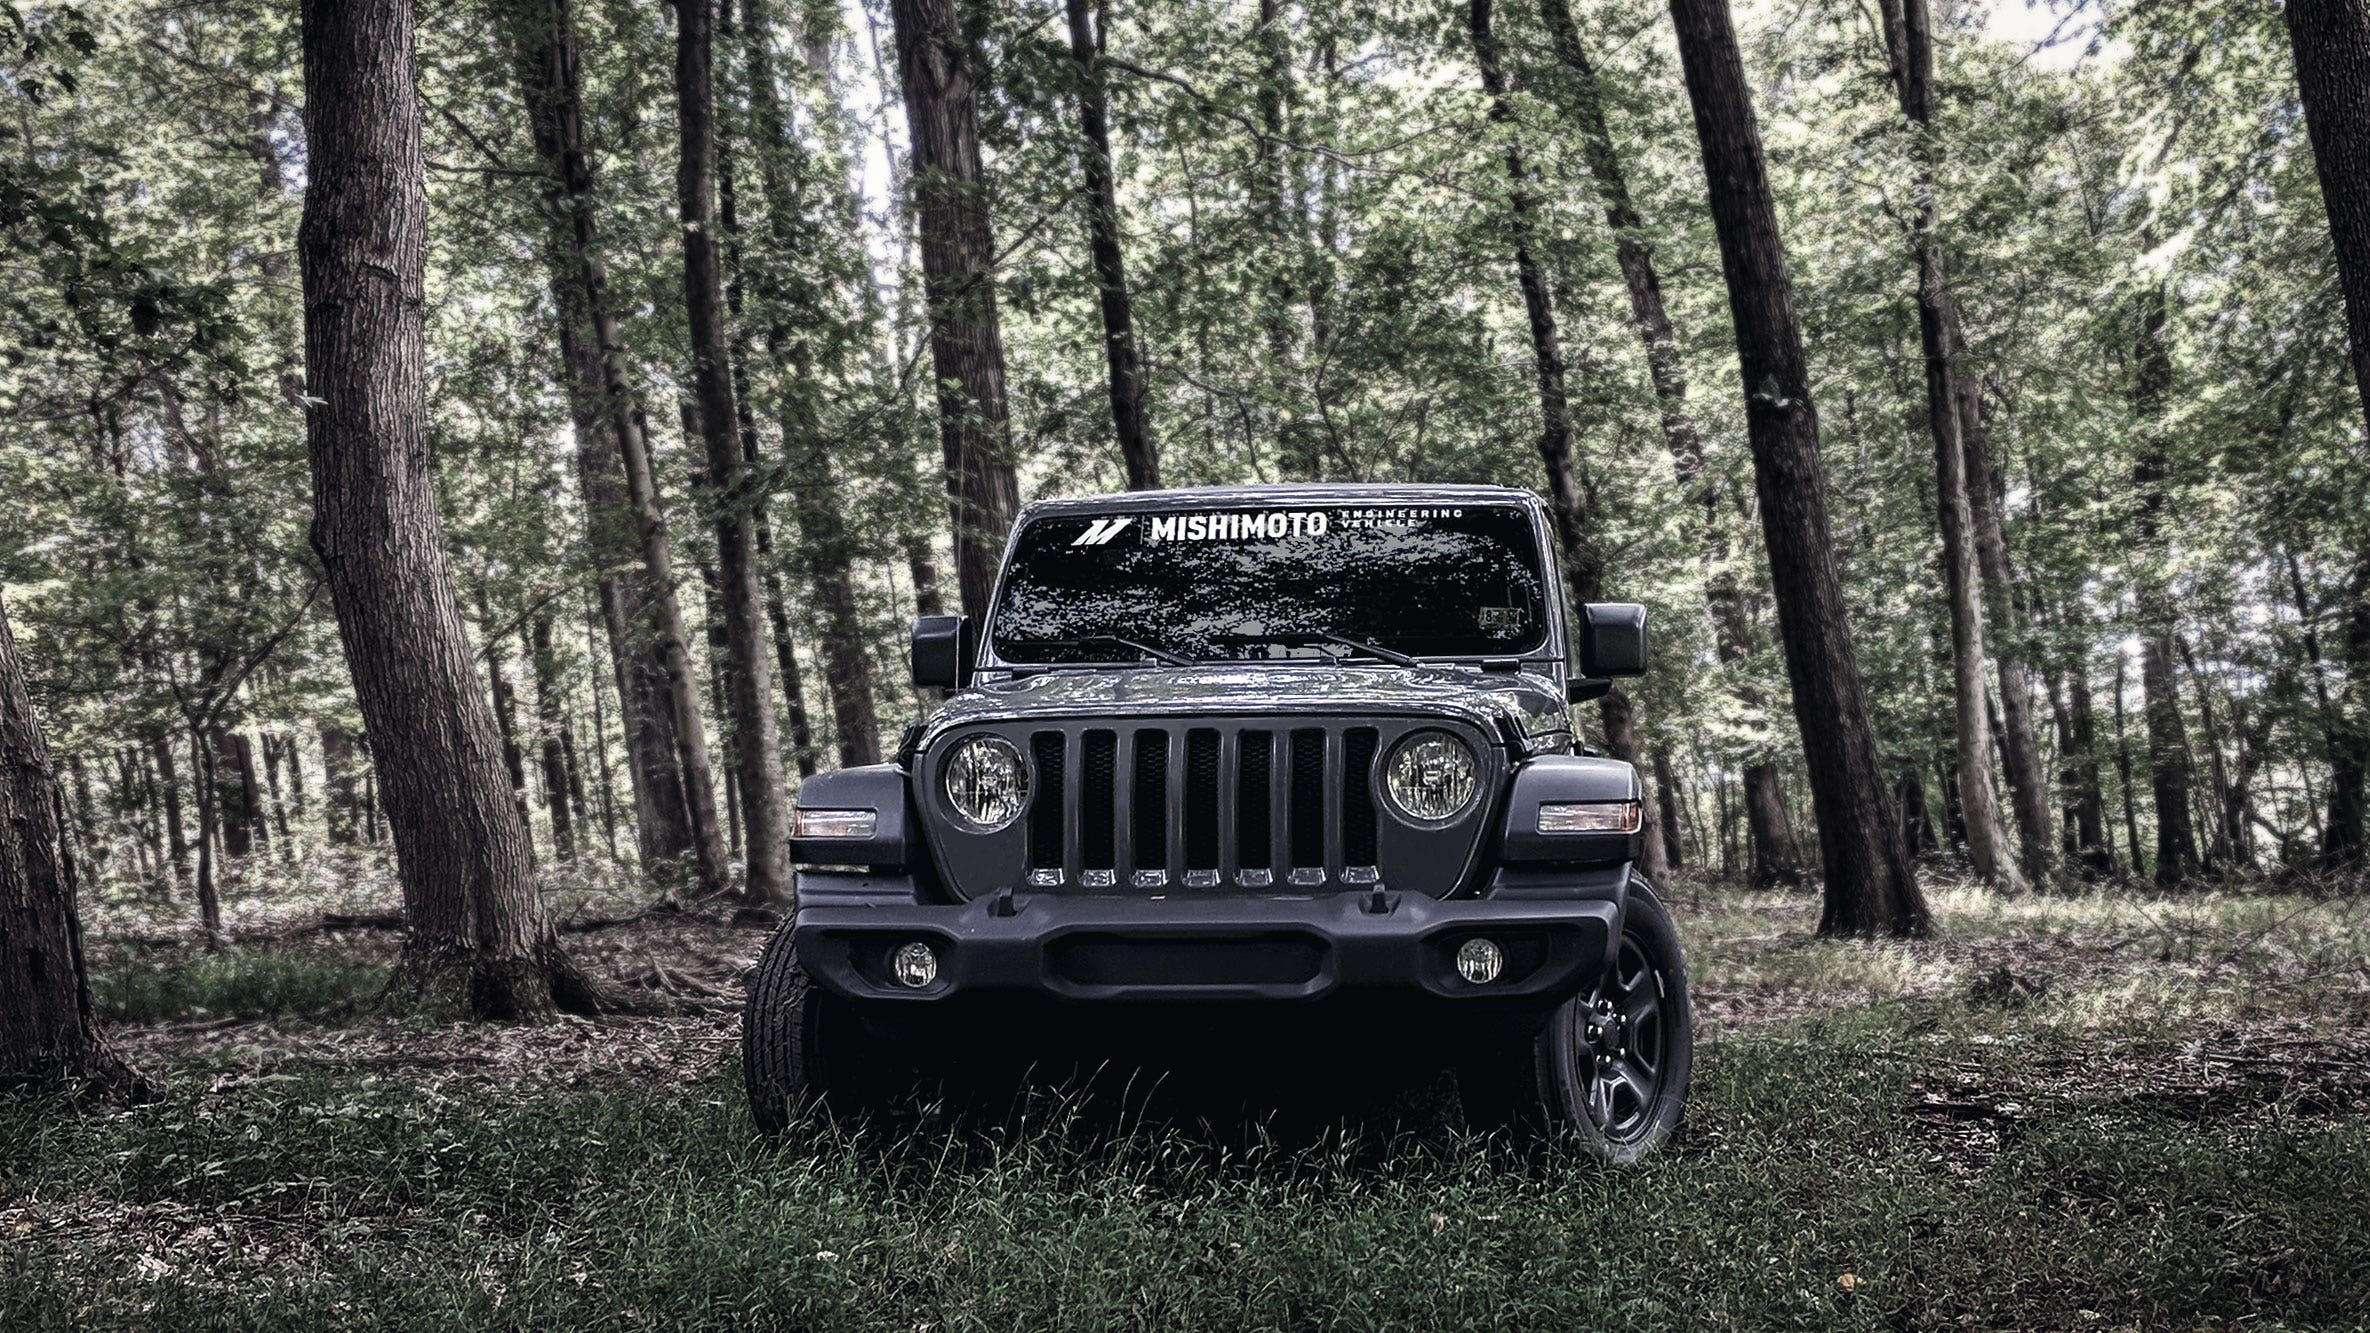
the development process unfold, we're taking the long road to our 2018+ Jeep
Wrangler JL 2.0T performance intake for the latter reason.
"Quality over speed" is our motto for many of our
projects, but in developing complex intakes like the one found on our JL's 2.0L
Hurricane engine, it's a requirement. Rushing through a project like this often
means fighting check engine lights and poor performance. In the end, rushing
takes longer than doing it right the first time.
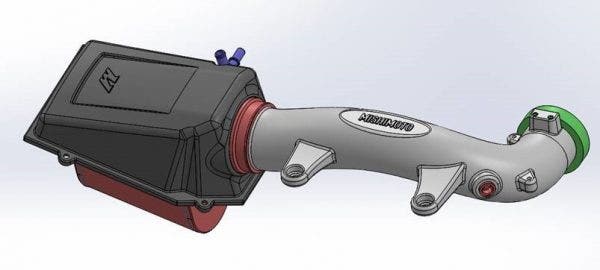
We've spent the last four months analyzing every detail of the stock Hurricane intake. Our engineer looked at what was important to keep and what we could improve upon. We learned how the stock intake flows and which components affect that flow the most. In our last post, our engineer, Ye, took that data and added some creativity to render a 3D model of our high-flowing intake.
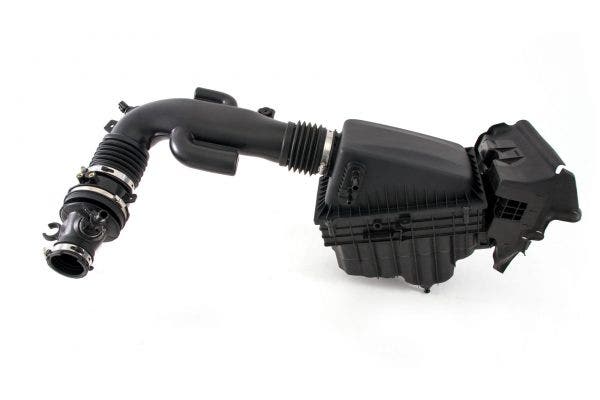
We've taken the best of the stock intake system and removed the resonators and corrugated couplers that hinder flow. Our intake will keep the lower airbox to help draw in cold air while maintaining the JL's water-fording ability. A custom-designed upper airbox, filter, and tube will replace the stock components for better flow.

A 3D model is a great start to any product design, but the
next steps are where things get exciting. To test fitment and performance, we
need physical prototypes.
For cooler prototypes, we often call on the skills of our fabricator, Mike, to create an aluminum core then add 3D-printed components to finish it off. But this intake would be a little different. The complex shapes and need for precision made our 3D printers the only tools for the job. Mike may be a master of all things metal, but our drafter, Josh, is an artisan when it comes to 3D printing.
While it may look like a click-it-and-forget-it process, 3D printing functional prototypes requires a knowledge of materials and processes that many never realize. After receiving the part designs from Ye, Josh carefully selected the best materials for each component and tweaked the printer settings for the best prints. After many, many hours of printing, our prototype intakes were ready for assembly.
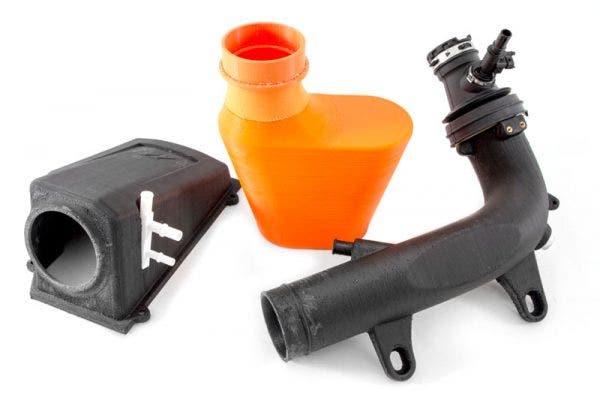
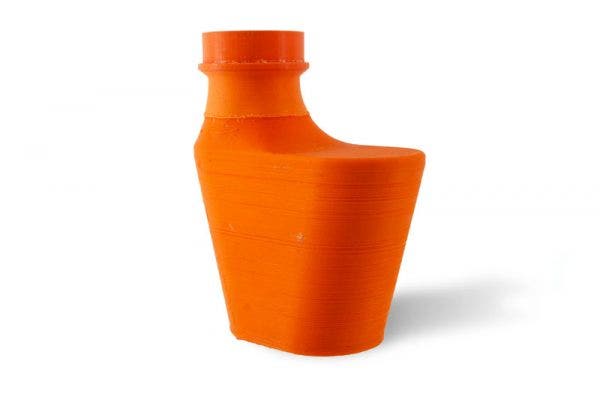
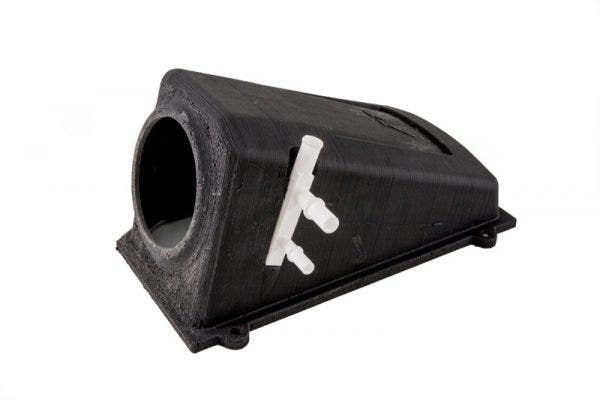
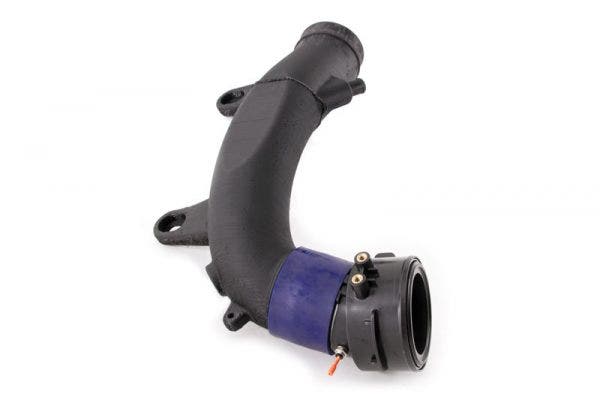
Our array of 3D printed parts includes an upper airbox (complete
with vacuum ports), two intake tubes, and a filter. You might be wondering how
we 3D printed a filter. Well, this filter is just a solid plastic
representation of our custom-made filter that we'll be using for fitment
testing. All the other 3D printed components were functional, however. Our
intake tubes and the airbox lid include all the sensor locations, ports, and
mounts to make them work on the vehicle for testing. We will have to get
creative with the filter when we flow-bench and dyno-test the intake, but
before we can even think about functional testing, we need to make sure
everything fits.
It's important that we do all the fitment testing before collecting
any flow or power data. If anything changes in the design of the intake as a
result of poor fitment, it would render any flow and power data useless. Our
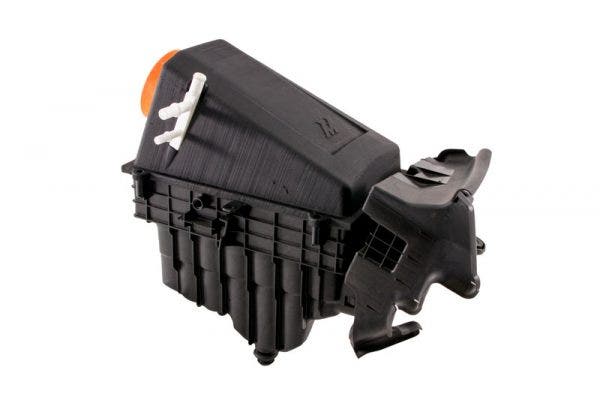
first fitment check was to see if our custom filter and airbox would fit inside
the stock lower airbox. We placed our plastic filter into the upper airbox and
screwed the upper box to the stock lower box. Nothing made contact where it
wasn't supposed to and the box closed tightly, so we could move on to test
fitting the rest of our intake.

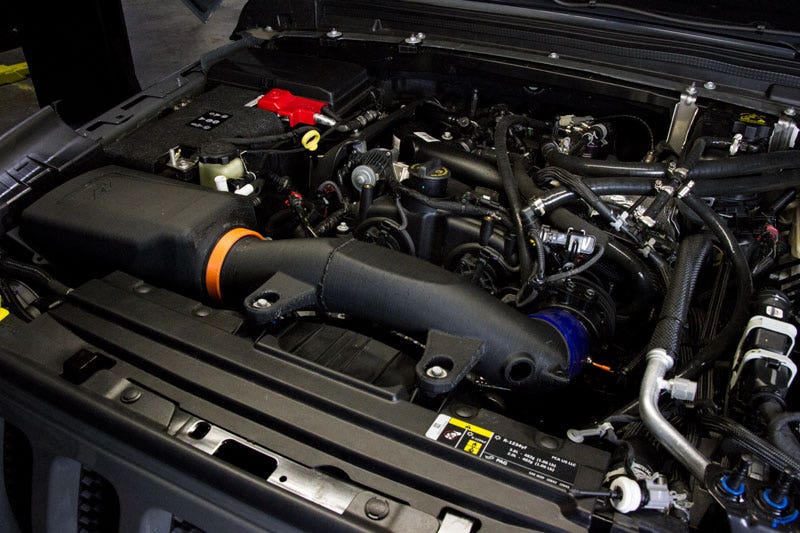
The remainder of our fitment testing will be done on the vehicle to check if our intake tubes fit. If you're confused why I keep saying intake "tubes," here's why. You'll recall from the last post that our stock intake flow test showed no difference in flow between the intake with the muffler and without the muffler. However, we still want to test an option without the muffler to see if we could improve the sound of the intake. If there isn't a noticeable difference in sound without the muffler, then keeping it will make our intake design simpler and keep cost down for our customers.
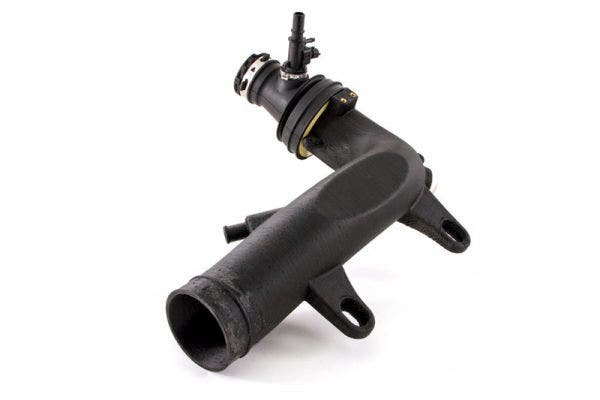
For our final prototype test fits, we removed the stock intake from our JL and installed our airbox with each of our intake tubes.
Both intake tubes fit perfectly, including the sensors. Our next stop on the long road of development for our 2018+ Jeep JL 2.0T performance intake is to determine just how much performance it has. We'll be flow bench testing the intake, then running our JL on the dyno to see how much power we can add on the stock tune. Before we can test anything though, we need a filter that can flow air. In the next post, we'll get creative building a filter and start the performance testing.

Keep an eye out for the next update and, as always, let us know what you think!