Layers of Cooling - Transmission Cooler R&D, Part 2: Prototype
The second post in any of our project blogs is usually where we show you an aluminum box that represents the outer dimensions of our planned product. This time though, we're going rogue.
Sort of.
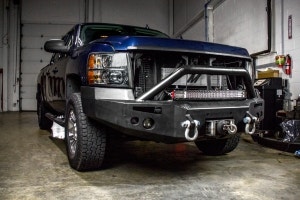
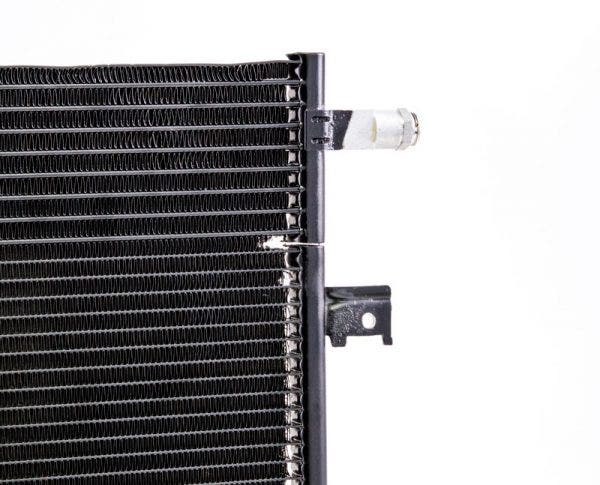
Our last post looked at the stock transmission cooler for Chevy/GMC's K2 chassis. To recap, the stock K2 transmission cooler is a bit of a chimera. If you were to look through the grille of a K2, you would never find the transmission cooler. Unlike other vehicles that have an obvious transmission cooler bolted onto the radiator, the K2 trans cooler is integrated into the truck's A/C condenser. Removing the A/C condenser from the vehicle doesn't make finding the transmission cooler any easier either. Only under close inspection can you see the break in the end-tank where the factory separated the two coolers. Otherwise, the A/C condenser and the transmission cooler share the similar tubes and fins, but the transmission cooler is about 1/3 the size of the A/C condenser.
If you've ever held an A/C condenser, you know that it doesn't feel like a part that should be entrusted with cooling a vital part of the vehicle. They hardly feel like they can cool the refrigerant in your A/C system, so why would you want 1/3 of one cooling your transmission. You don't, and that's why we're working on our replacement that's better suited to cool a multi-thousand-dollar part of your K2.
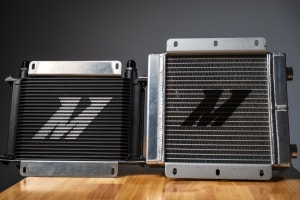
Normally this is where I would show our engineer measuring up the space behind the grille so that we could weld together a mock-up and test fit it. But this time, we're skipping part of the process. You see, we've been working on the previous generation of these trucks to develop our 2001-2014 Duramax transmission cooler. We had a hunch that we could adapt our Duramax core to work on the K2 V8 platform, and lucky for us, we had one leftover.
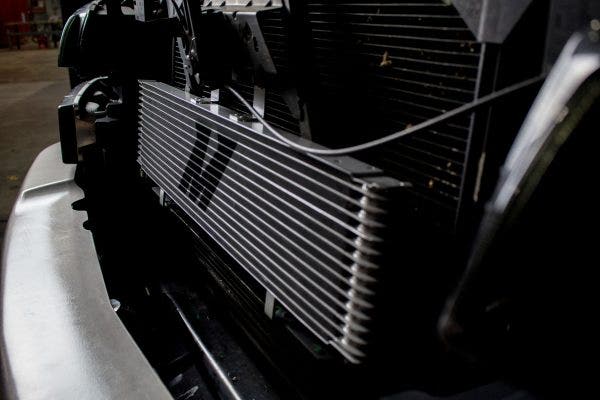
Our 2001-2014 Duramax transmission cooler
Without a traditional bolt-on cooler to replace, mounting ours would be a challenge. We couldn't just lop the stock cooler off the A/C condenser, so our engineer had to come up with a clever solution. We took a few measurements (you didn't think we'd get through this whole project without measuring anything, did you?) and split across the shop.
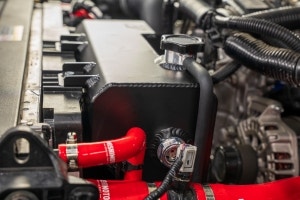
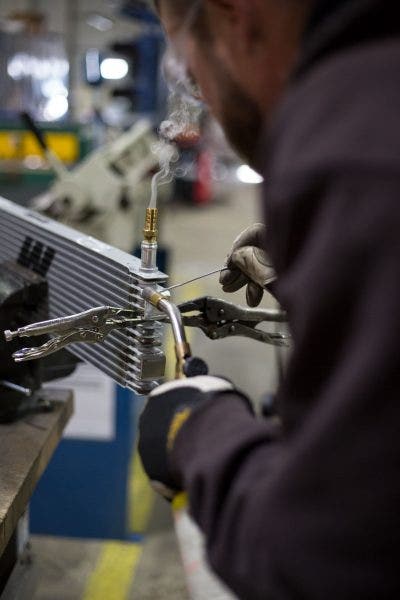
Over in our fabrication area, our head fabricator swapped out his welder for a MAP gas torch. Our plan was to braze on brackets that would let us bolt on mounts. Welding on the thin material of the core would likely blow a hole into a fluid passage or melt the brazing between the plates and cause a leak. So, Mike carefully applied heat to a brazing rod and joined the brackets to the core.
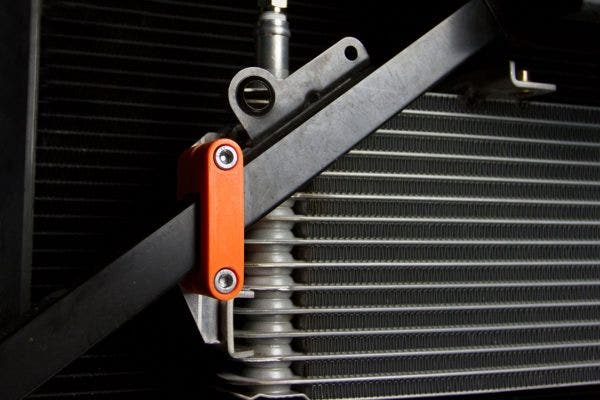
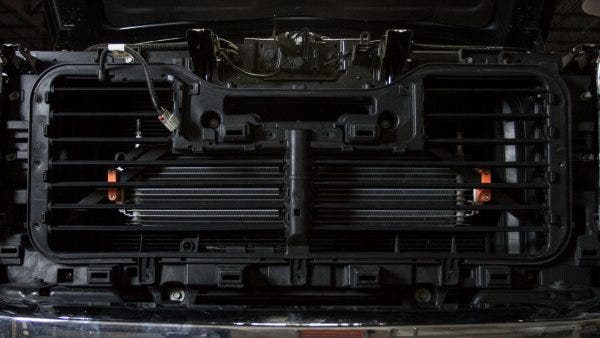
On the other side of the shop, the 3D printer was churning out a set of plastic mounts that would connect to those brackets and clamp the cooler to the V-shaped support behind the truck's grille. Friction and physics would keep the cooler in place without having to drill any holes or cut anything on the truck. With the core installed on the truck, we made sure it fit with the grille and active shutters.
Our next challenge would be connecting our core to the stock transmission cooler circuit. The odd design of the stock trans cooler would make routing the lines even more of a challenge than mounting our core. But, we'll have to save that adventure for the next post. For now, feel free to let us know if you have any questions or comments and keep an eye out for the next update.
Thanks for reading!
-Steve