Keeping The Party Cool! Mishimoto's Ford Fiesta ST Radiator R&D, Part 3: Initial Fan Shroud Fabrication
Interested in picking up our Fiesta ST aluminum radiator? Check out our discounted pre-sale linked below.
Mishimoto 2014+ Ford Fiesta ST Aluminum Radiator Pre-Sale!
It's been a few months since our last major update, and for good reason. Our team has been quite busy. As a quick recap, last time we test fitted our first Ford Fiesta ST (FIST) radiator prototype, only to find that the core thickness was larger than the vehicle would allow. Once the radiator was bolted to the fan shroud, the shroud made contact with numerous components on the engine, prompting us to pull out our markers and take a second look at the drawing board.
Now, keep in mind the FIST has some serious cooling issues. Any pleasures on the track are normally negated after a lap or two causes coolant temperatures to reach the stratosphere, prompting a quick dart to the paddock. To improve the chances of our radiator holding up in any condition, we obviously want to stuff the largest, most efficient core possible into the constraints of the Fiesta engine bay. So, we didn't scrap our first radiator just yet. Instead, we're going to find a way to make it fit. This involves modification of the fan shroud to squeeze our 2.25" core into place.
Mishimoto Slim Fan Fitment
We decided to use one of our electric slim fans. At the least, using this fan would allow us to install our radiator to verify our mounting-point fitment.
First, we attached our fan directly to the core of the radiator.
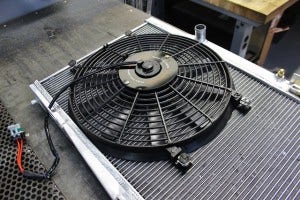
Slim electric fan installed on Ford Fiesta ST radiator prototype
You will notice we've added a wiring pigtail to connect to the factory harness, making this a plug-and-play setup. Additionally, this setup has no shrouding, meaning we are not taking full advantage of the airflow produced by the fan. But keep in mind, we are using this setup primarily for fitment testing.
We've also placed the fan as far to the driver's side as possible. This reduces the chance of clearance concerns with various components on the passenger side of the engine compartment.
After attempting the install, we found that our mounting peg diameter was slightly off, requiring some lathe work to fabricate new pegs for the radiator mounts.

Turning new mounting pegs for the Ford Fiesta radiator
Once complete, we could finally bolt this assembly into place.

Mishimoto Ford Fiesta ST radiator installed
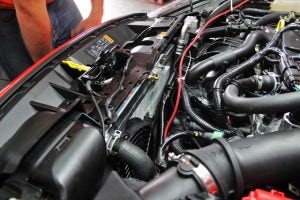
Mishimoto Ford Fiesta ST radiator installed
Another feature you can see in this shot is a new, experimental air-bleed port, located in the center of the upper end tank. Bleeding air from the cooling system can be a pain, and any remaining air pockets can result in overheating.
This bleeder requires only light pressing to release air in the system, much easier than removing a bolt or loosening a screw. I won't guarantee this will be on our final product, but we will be evaluating its effectiveness during the testing of our radiator.
Here's one more look at this radiator, installed from below.

Mishimoto Ford Fiesta ST radiator installed
We zip-tied the fan control unit in place temporarily as we might be testing this in the future. At this point, we made a decision to take a new direction. The full-speed amperage for the FIST fan controller is quite specific and is not compatible with our electric fan. This meant we would possibly need to include our ancillary fan controller and sensor, which would raise the price and add complexity.
Instead, we thought maybe we could use the stock fan and design a new shroud around it. So began a new quest for Fiesta coolant temperature control.
Fan Shroud Fabrication
First, we removed the fan blade and motor assembly from the stock shroud.
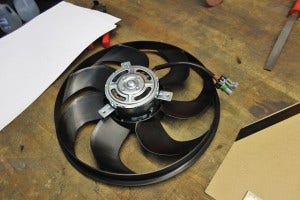
Stock fan assembly
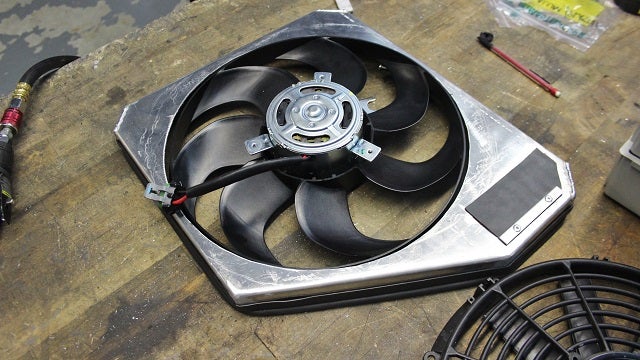
We started the construction of our shroud using a flat sheet of aluminum.

Material for fabricating a fan shroud for Ford Fiesta ST radiator
We bent the piece into shape and then cut out the hole for the fan blades.

Ford Fiesta radiator fan shroud fabrication
Once the hole was cut, we welded the seams along the bends.

Ford Fiesta radiator fan shroud fabrication
You'll notice in the foreground of the image above, there is another port in place on the shroud. We designed this to accept a flap similar to those located on the stock shroud. During idle conditions, this flap will close to allow the shroud to funnel airflow through the core. At speed, the flap will open to allow airflow through the radiator core with as little restriction as possible.
In addition, our shroud is located only on the driver side of the radiator, which allows more at-speed airflow through the core and should have a nice impact on heat transfer during vehicle motion. A closer look at the flap is shown below.

Ford Fiesta radiator fan shroud fabrication
That completes the basic structure of our shroud design. We added some weather stripping material to the inner edge to provide a nice seal with the radiator core.
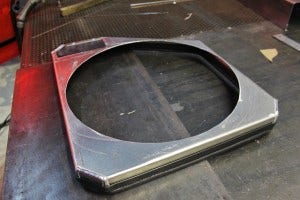
Ford Fiesta radiator fan shroud fabrication
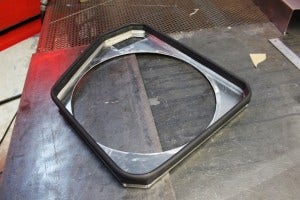
Ford Fiesta ST radiator fan shroud fabrication
Check out a shot of the fan assembly in its projected location within our shroud.

Ford Fiesta ST radiator fan shroud fabrication
Coming Up
We aren't done here! We have a few additions to make to this shroud before finalizing the design. First, we need to fabricate a blade cage and motor-mounting point. We also need mounting points to attach this unit to the Ford Fiesta radiator, as well as a mounting location for the fan control unit.
Check back next time for a look at the final fan shroud design. This next update will be coming soon!
Thanks for reading.
-John
