Flex-Free Cornering. Fiesta ST Trunk Brace R&D, Part 2: Prototype Completion
We left off development with a neat look at our first prototype, when we determined the shape and path of our brace and printed out mounting brackets for each side of the piece. By using specific angles with our square material, we were able to avoid modification of the seat mounting bracket, retain rigidity, and provide a bar that is easily hidden by the rear tray.
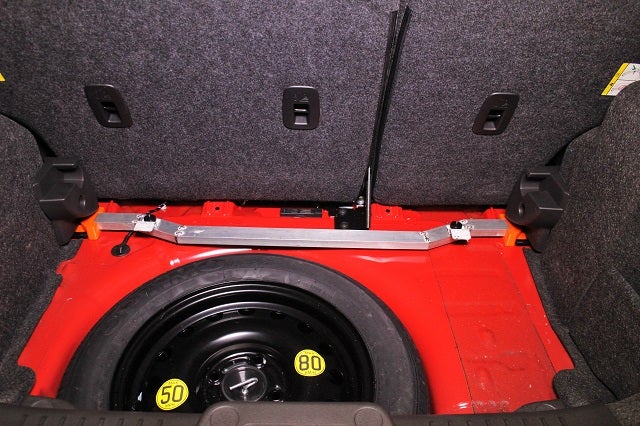
Our last image showed our fabricator tacking together the material. Below is what we ended up with.
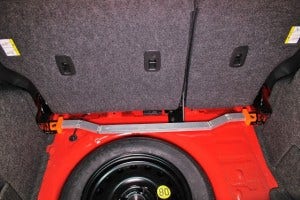
Prototype Fiesta ST rear strut brace installed
We then installed the floor panel mounting covers.
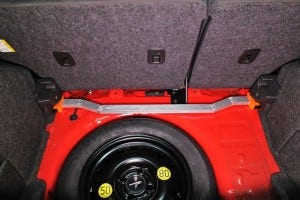
Prototype Fiesta ST rear strut brace installed
Let's take a closer look at how the plastic interior components sit with respect to our brace mounts.
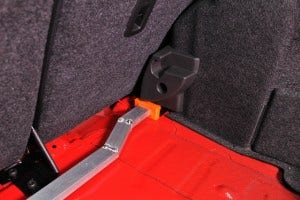
Prototype Fiesta ST rear strut brace installed
As you can see, the height of our mounts will prevent use of the lower mounting position for the rear tray. We want this bar to allow the tray to fit in both the lower and upper positions, retaining all intensions from the factory design.
First Prototype Adjustments
We typically go through a few prototype iterations as we work out minor bugs. Time spent and the collective brainpower of our team truly shows in the final product.
After much consideration, we modified the mounts to lower the profile. Doing so allows the rear floor tray to sit in the lower position, maximizing trunk space.
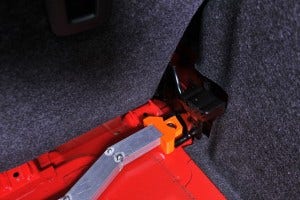
Prototype Fiesta ST rear strut brace installed
As you can see, we've trimmed the height and adjusted the shape slightly. This should give us the space needed to fit the floor in both positions.
Check out another shot of this prototype iteration.
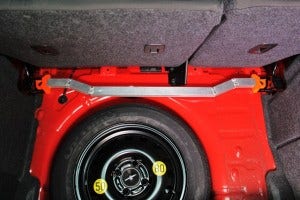
Fiesta ST parts development
Looking good!
How could we make it better?
This question is constantly tossed around during product development. Guess what? We found one more feature to build into this component.
One of our quibbles with the stock tray fitment had to do with stability. In the lower position, the rear of the tray is unsupported and not exactly balanced. Not a big deal, but we figured out an easy way to support the tray and balance it perfectly for when you are loading up the trunk with groceries, track tires, friends you don't like, toilet paper, etc.
We started by bending a couple simple brackets.
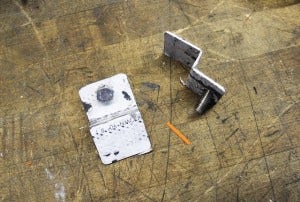
Fiesta ST parts development
For ease of installation, these will need to be removable. We installed two rivet nuts into the bar to thread our bolts into.
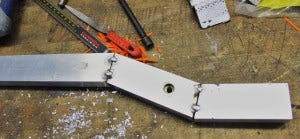
Fiesta ST parts development
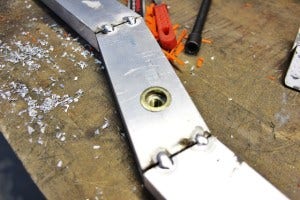
Fiesta ST parts development
Bolts are pretty inconvenient though, especially if this piece needs to come in and out easily. Enter the almighty thumb screw!
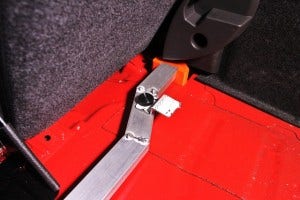
Fiesta ST performance parts development
Check out both of these brackets in place.
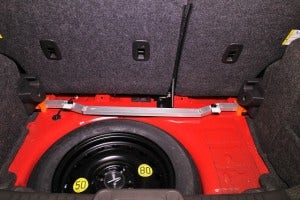
Fiesta ST performance parts development
Once the rear tray is in place, most of the bracing and brackets are covered, although the thumb screws are still accessible.
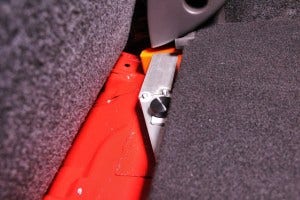
Fiesta ST performance parts development
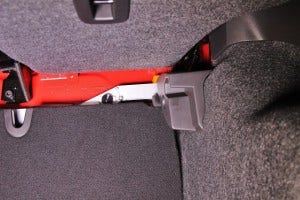
Fiesta ST performance parts development
More importantly, the tray is well supported in all areas with these additional brackets.
Function: Check!
Form: Check!
With the tray in the upper position, the brackets can be removed and the brace is completely hidden.
Coming Up!
A prototype with plastic portions is certainly not going to do us much good for product testing. We will be working up a full metal piece with all our new features. This will allow us to conduct test fitting and on-road product testing.
Check back soon for a look at our functional prototype. Keep an eye on our blog for more exciting Fiesta ST product development.
Thanks for reading.
-John
