Keeping the E36 Cool, Part 1: Initial Fan Shroud Design
Interested in picking up our E36 fan shroud? Check out the full details on this kit on our product page!
Mishimoto BMW E36 Performance Fan Shroud Kit!

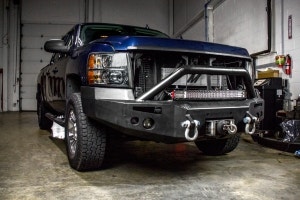
E36 M3 test vehicle
Cooling systems on older BMW models have been recognized as a frequent failure point requiring regular replacement to avoid catastrophic failure. This includes anything made of plastic within the system. So far we have a few remedies - an aluminum radiator and a silicone coolant hose kit. The mechanical fan is next on our list to be addressed.
The stock fan setup is certainly efficient in keeping your straight six cool. That said, a fan failure can get quite ugly with shrapnel tossed around the engine bay, often damaging other components. To reduce vehicle downtime and expense, it would be wise to replace this component before failure occurs.
Swapping your antiquated mechanical setup for an efficient electric system is a great way to improve reliability, and even free up some power on your vehicle. Check out the process we took to bring you guys a slick fan setup!
First Prototype Design
Before even starting our design, we wanted to explore a few new features that could be included with our fan shroud. For years we have been developing and releasing functional and effective aluminum shrouds, but once in a while we like to try something new to see if a positive impact is made on the end product.
For our first test we installed some air flaps on our shroud to allow airflow at driving speeds and then close when the fan is operating at a stop. When closed, the fan can then take full advantage of the shroud and its ability to pull air through the radiator. Check out a few shots during some basic bench testing.

Prototype airflow flap testing
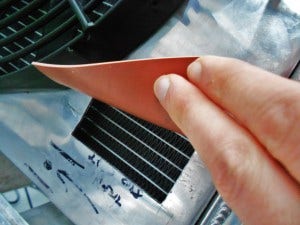
Prototype airflow flap testing
We also set up one of our intercooler dyno fans, which achieves 30-40 mph wind speeds, to see the effect on the flap movement and airflow through the core.

Prototype airflow flap testing
Modeling the Shroud
Testing seemed positive on the bench (off the vehicle), but we also wanted to test this system on the road. So next, we created a 3D model depicting our plans for this shroud. Check out a few images from the Solidworks design software.
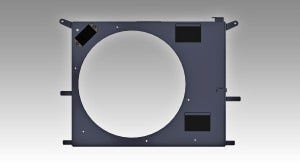
First prototype design rendering

First prototype design rendering

First prototype design rendering
A few things to note on this design. First, the fan has been offset to the driver side of the radiator. This provides greater clearance between the engine pulley systems. Bushings for the E36 engine and transmission mount can wear and cause significant movement of the engine. If our tolerances are too tight, this could mean big problems for your new electric fan setup. Next, we have incorporated a stock overflow bottle mount on the passenger side of the shroud. Our shroud is being designed to function with the stock unit. Additionally, we are designing an aluminum counterpart that will also function with our shroud (and the stock shroud). Last, we have mounted our fan controller to the driver's upper corner, which allows the fan activation temperature to be adjusted to the owner's liking.
Check back with us next time for testing of this first prototype, and a look at our second idea!
Thanks